
Background
In the platform, the data structure is based on three tiers. At the top is a program. A program utilizes one HI tool and can have one or more sites.
Each site can also have one or more groups, and surveys are administered to program participants who are in the same group.
For each group, unique survey identifiers are created that allow for flexible data tracking and reporting at the group, site or program level.
KEY TERMS
-
Program - a set of coordinated activities, services, or resources that offer participants comparable experiences and similar outcomes regardless of location or oversight
- Site - a physical location or region where a program takes place, or another way of segmenting program participants you survey when physical locations or regions are not applicable (i.e., lead staff, teams)
- Group - a set of program participants that you survey directly
When you add a new program, you'll need to add at least one site and an associated group in order to generate surveys and collect data.
TIP: Before you add a program to the platform, we recommend completing the Template for Planning Data Collection and Reporting. This should speed up the times it takes to add a program in the platform!
Add a New Program
From the dashboard, select the Add Program button (upper right). This takes you to the Program Setup flow, a sequence of six steps to fully set up a program.
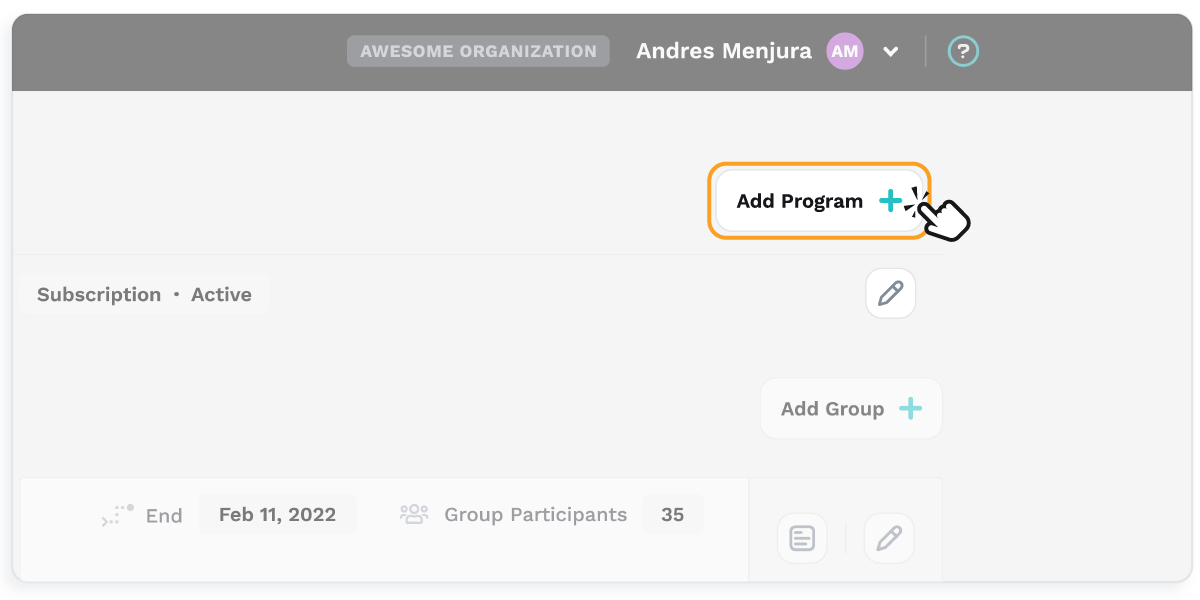
Note: If you are accessing your dashboard for the first time, you will be prompted to add a program.
1 - Select Your HI Subscription or Scholarship
Select the subscription or scholarship you want to use for the new program.
Note: To become a Hello Insight member, either your organization purchases a subscription or a third party grants a scholarship to your organization. Each subscription or scholarship provides access to a set number of surveys and one or more tools.
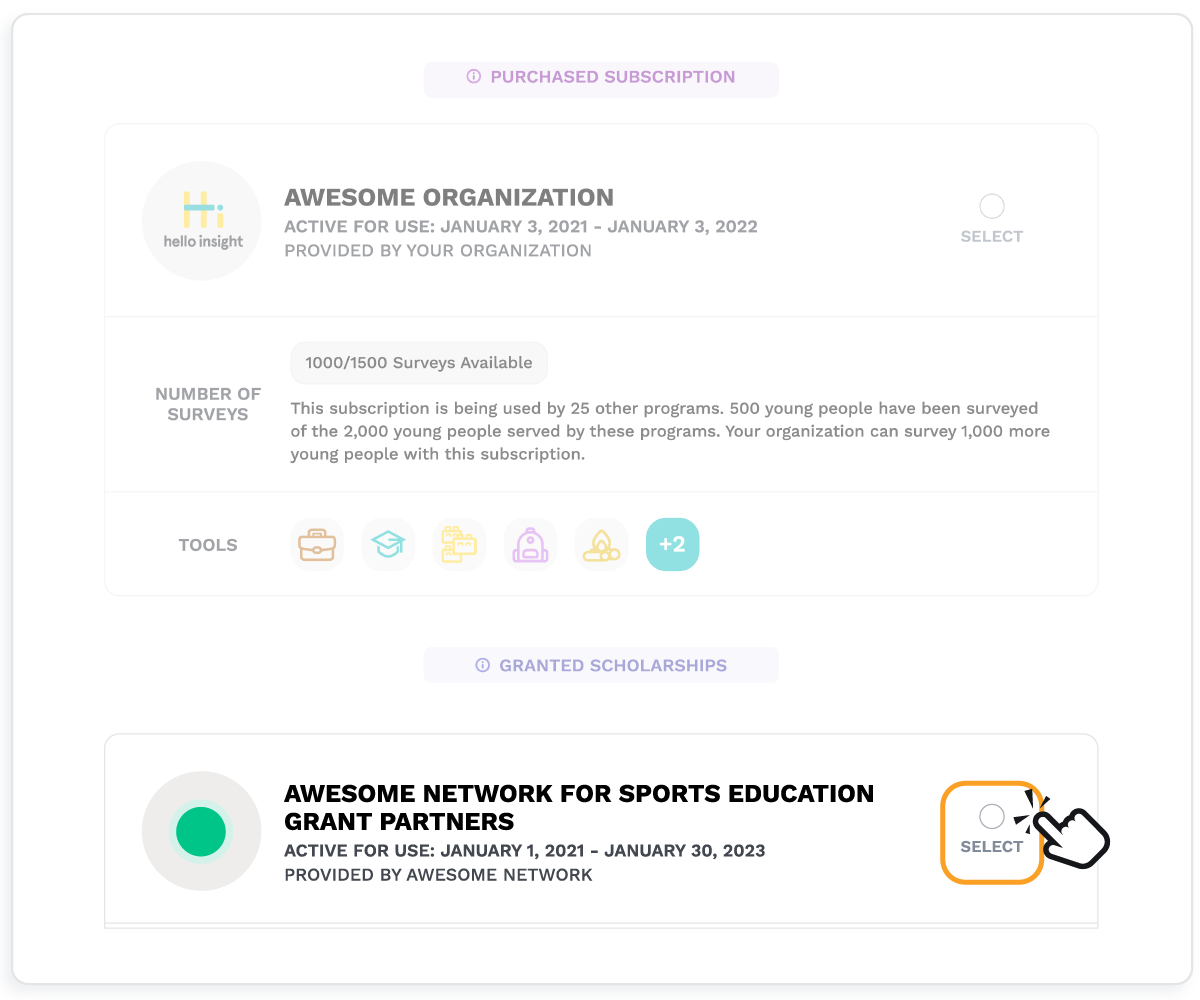
Whether you have one or multiple active Hello Insight subscriptions/scholarships, you must select one subscription or scholarship to proceed.
If there is no option to select a subscription or scholarship, you may not have an active membership. Contact outreach (outreach@helloinsight.org) to discuss your options.
Notes
- The active for use time range specifies the start and end dates of your subscription/scholarship.
- Be sure to review the number of surveys available, the HI tools you have access to, and--for scholarships--the intended use. This is necessary to ensure that the program you are adding fits with the subscription/scholarship that is selected. It will also help you identify if any changes are required.
- For example, if you want to survey 200 young people in this program but you only have 100 available, you may need to purchase additional surveys or prioritize who you will survey. If you want to survey 5-year-olds, you will need to make sure you have access to HI Early Elementary SEL, which is the only tool validated for that age.
2 - Add Program Info
Name your program and select the tool you will use for this program.
Tips
- You are not able to change your tool selection once you assign a group to a program.
- Be sure to include the program timeframe (i.e., year, year and season, etc.) in the name (i.e., “West HS 2021-2022” or “Greenville 2019 Spring”). This will help you easily distinguish data gathered through multiple cycles, especially if you are surveying the same program more than once.
3 - Add Sites
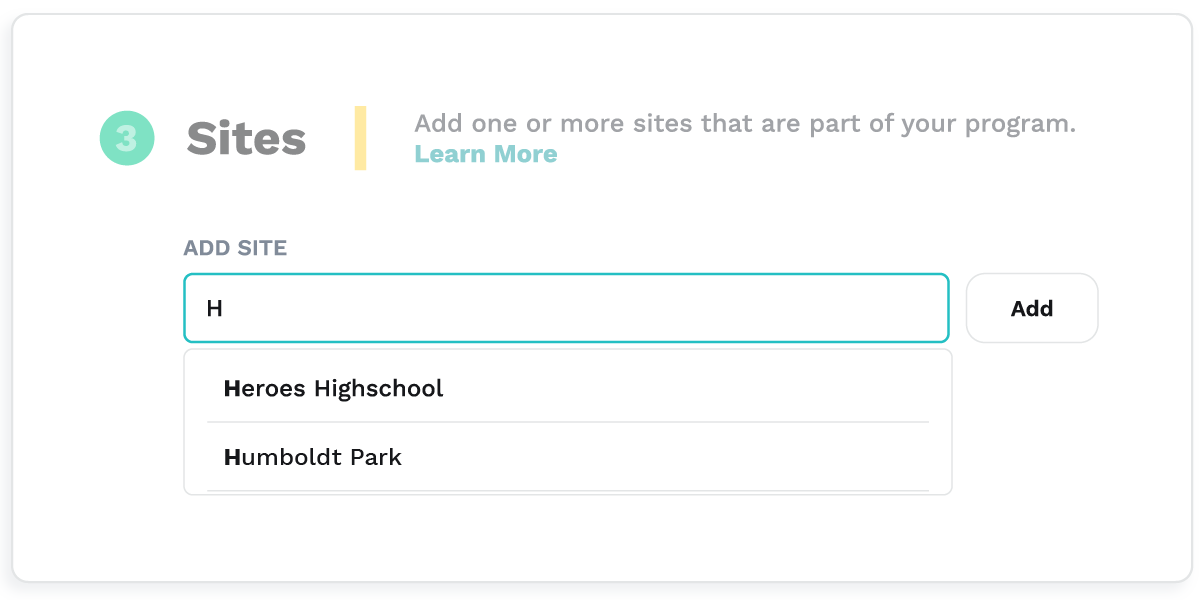
Add one or more sites to the new program you are setting up.
If you have already have programs in your account, the sites from these programs will appear in a drop-down menu when you click on the Add Site entry field.
Select any existing sites you want to add to the program.
If you need to add a new Site, type the name into the entry box and then click the add button on the right-hand side.
Tip: If you need to add or edit sites after your program is set up, use the Manage Program feature from your dashboard.
4 - Add Groups
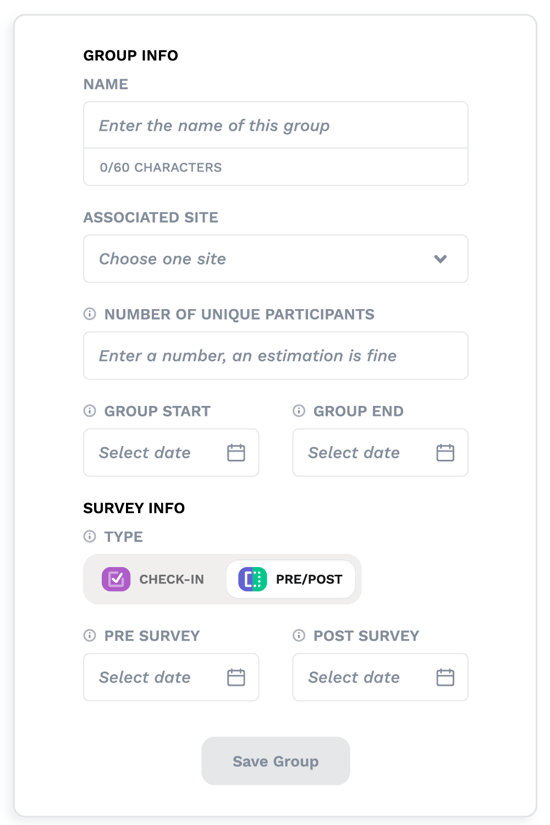
To create your first group, complete all fields and selections under Group Info.
KEY TERMS
- Group Info
- Associated site - A group can only be assigned to one site.
- Number of unique participants - This is the number of participants in a group. An estimate is ok, but be sure to update this number when you have more accurate information. We use this number to calculate recommended response rates and for reporting.
- Group start & group end - The date your program activities begin and end for this group. The start and end dates do not need to be the dates that you collect surveys.
- Survey info
- Type - You must choose either check-in or pre/post. Check-in surveys measure research-based experiences shown to develop SEL based on a single point in time. Pre/post surveys measure those same research-based experiences and SEL growth (at post).
- Survey Dates - Enter one or more target dates that indicate when you plan to collect survey responses. Pre should be near the beginning of the program, post near the end, and check-ins usually occur at the midpoint or end of program.
Once you save the group, you will see it added to the list of New Groups on the left. The groups are listed under their corresponding site.
In the example below, the user added three groups to the site called ABJ Community Services. The icons indicate check-in or pre/post selections.
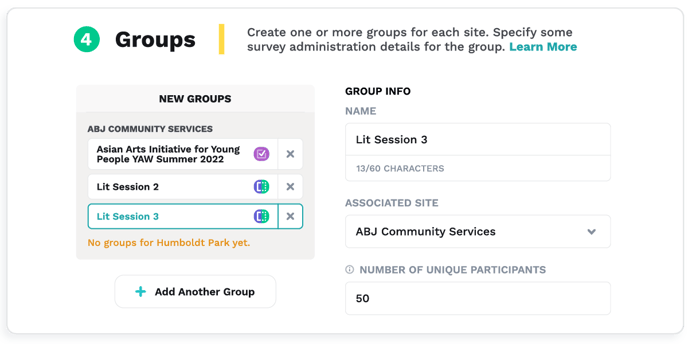
To continue adding groups, select Add Another Group in the left column and complete all fields and selections on the right under Group Info.
Tip: After completing your program set up, you can also add or edit groups directly from your dashboard.
5 - Add Program Admins (optional)
Note: Program administrators (PAs) are able to add and edit groups, access survey links for distribution, track survey responses, and view reports for sites to which you grant them access.
To add a PA, complete all fields and selections under Program Admin Info.
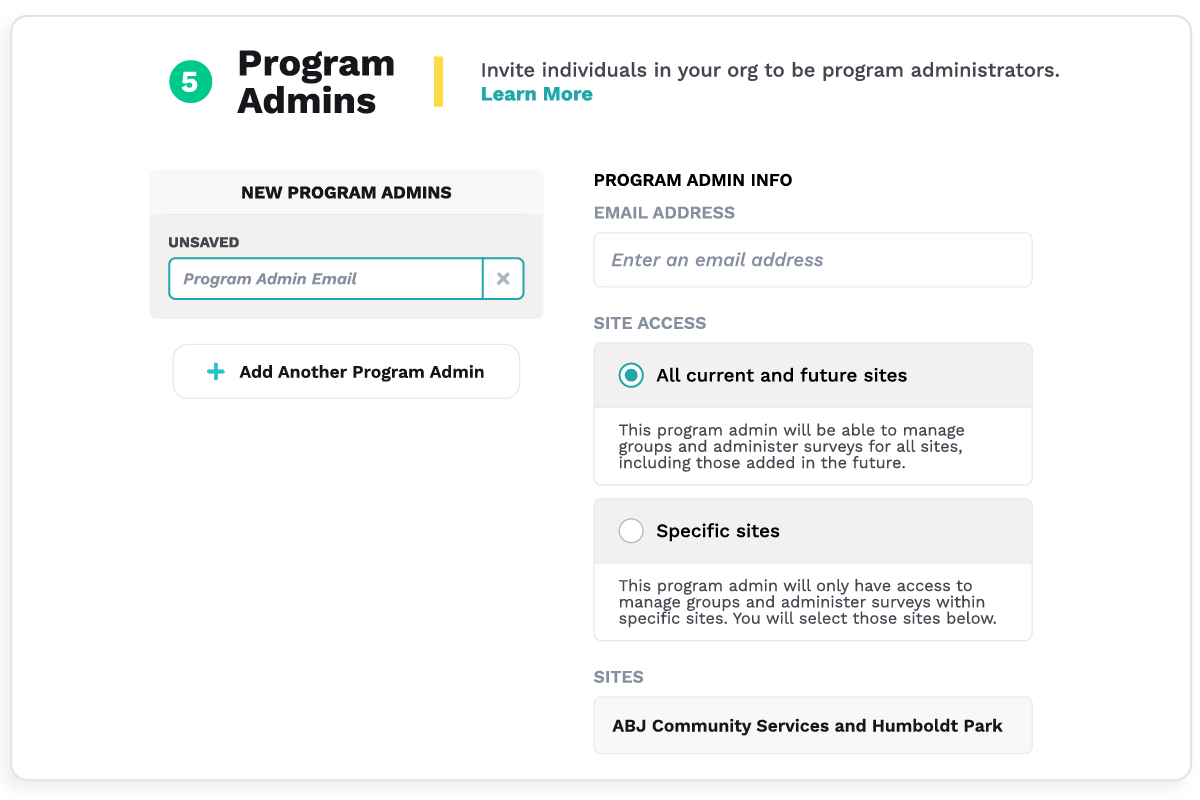
Site Access Options
- Specific sites - The PA can manage groups and administer surveys for the sites that you select.
- All current and future sites - The PA can manage groups and administer surveys for all sites, including those added in the future.
Once you save the PA info, you will see it added to the list of New Program Admins on the left. The PAS are listed under their corresponding site access category.
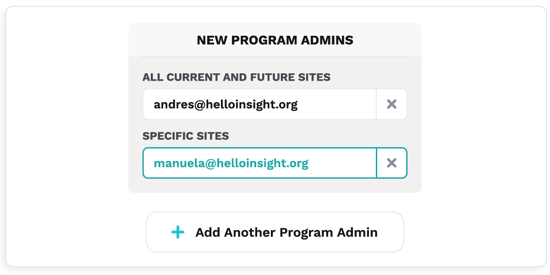
To add additional PAs, select Add Program Admin in the left column. Then, complete the info under Program Admin Info (right column) again.
Tip: You can add PAs or edit PA info/access via the pencil icon (Manage Program) at the program level of your dashboard (upper right). You can add/edit account administrators (AA), who will be able to access and manage all details of all your programs, via My Account.
6 - Review Program Set Up
Check your work! To make changes, you can navigate back to prior steps before you select Save and Complete.
Tip: Once you complete this setup flow, you can add/edit sites, groups, and PAs from your dashboard.
Edit a Program
AAs can edit programs at any time.
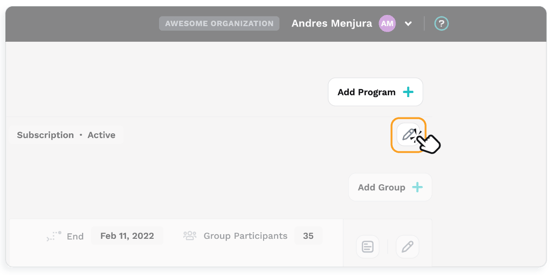
From your dashboard, select the program from the Program dropdown.

Then, select the pencil icon (Manage Program) at the program level of your dashboard (upper right).
Within Manage Program, use the left navigation menu to make the appropriate changes.
Navigation Options
- Program Information
- General Information - change the program name, add sites. Note that you are not able to change the tool associated with the program.
- Detailed Information - Change the number of program participants in the program, add the number of program full-time employees, add/edit the program description
- Program Administrators
- Manage - Edit PA email, edit PA access, remove PAs
- Invitations - Add PAs, set access to sites/groups, and send an invite to access the platform; monitor who has accepted invites